教你如何使用u盘安装Linux系统
小伙伴你们知道怎么使用u盘来安装Linux系统吗?可能大多数的人都好还不太清楚,不知道的也没关系哟,小编这就来将u盘安装Linux系统的操作步骤来带给你们。
小伙伴之所以知道利用u盘进行安装Linux系统的方法,其实是因为小编的一个朋友告诉小编的,然后小编就多了解了一下这个方面的内容,所以现在小编就再来将使用u盘进行安装Linux系统的安装方法来分享给小伙伴们。
第一步:制作Linux启动u盘
1,首先准备好大于的8G U盘一个,因为现在的镜像基本上都有4G多,4G的U盘可能空间不够。同时提前下载好CentOS 7.9的安装镜像以及刻录镜像到U盘上的软件UltraISO。如下图所示:
清华的镜像地址:https://mirrors.tuna.tsinghua.edu.cn/centos/7.9.2009/isos/x86_64/
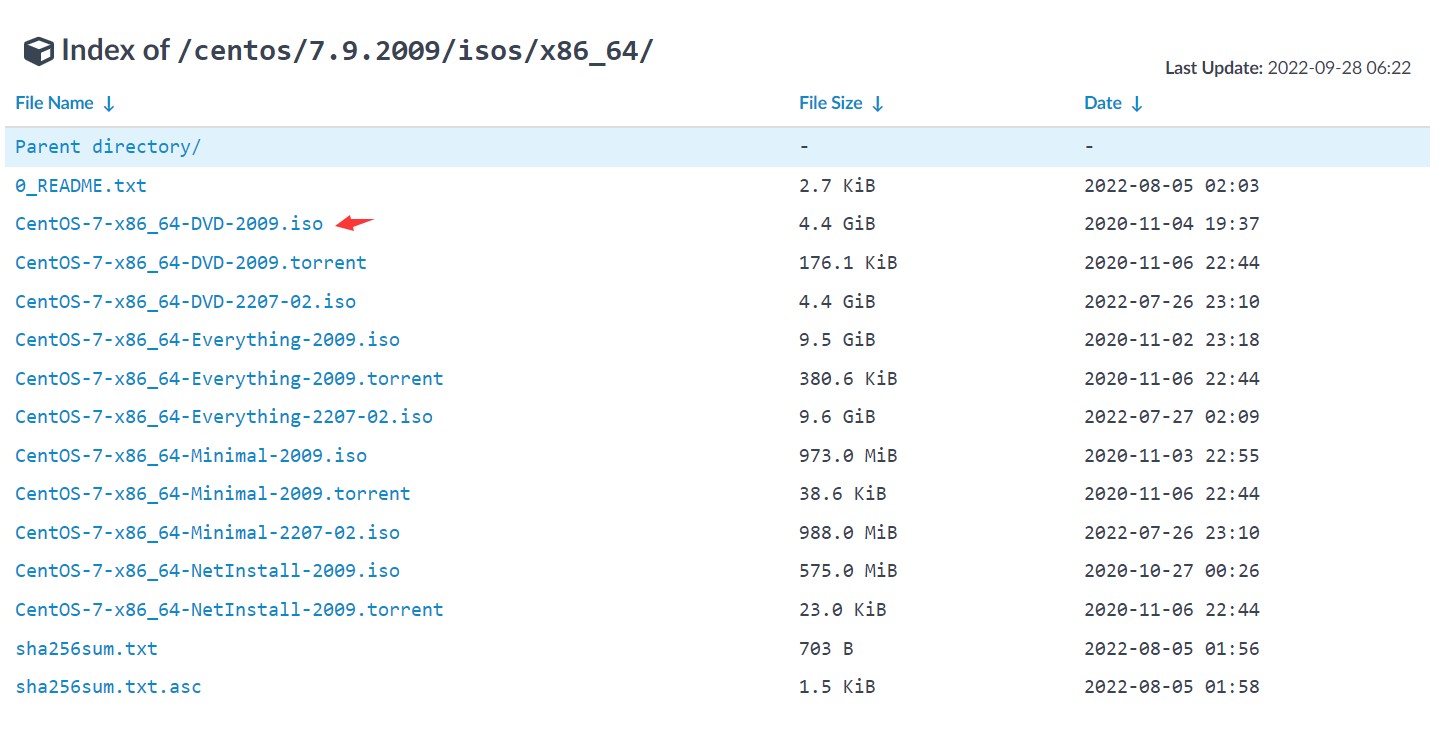
版本说明
CentOS-7-x86_64-DVD-2009.iso
  This DVD image contains all the packages that can be installed using the
  installer. This is the recommended image for most users.

CentOS-7-x86_64-NetInstall-2009.iso
  This is the network install and rescue image. The installer will ask from
  where it should fetch the packages to be installed. This image is most
  useful if you have a local mirror of CentOS packages.

CentOS-7-x86_64-Everything-2009.iso
  This image contains the complete set of packages for  CentOS Linux 7. It can be
  used for installing or populating a local mirror. This image needs a 16GB USB
  flash drive as it is too large for DVD isos.

CentOS-7-x86_64-LiveGNOME-2009.iso
CentOS-7-x86_64-LiveKDE-2009.iso
  These images are Live images of  CentOS Linux 7. Depending on the name they use the
  respective display manager. They are designed for testing purposes and
  exploring the  CentOS Linux 7 environment. They will not modify the content of your
  hard disk, unless you choose to install  CentOS Linux 7 from within the Live
  environment. Please be advised that you can not change the set of installed
  packages in this case. This needs to be done within the installed system
  using 'yum'.

CentOS-7-x86_64-Minimal-2009.iso
  The aim of this image is to install a very basic  CentOS Linux 7 system, with the
  minimum of packages needed to have a functional system. Please burn this image
  onto a CD and boot your computer off it. A preselected set of packages will be
  installed on your system. Everything else needs to be installed using yum. The set
  of packages installed by this image is identical to the one installed when choosing
  the group named "Minimal" from the full DVD image.

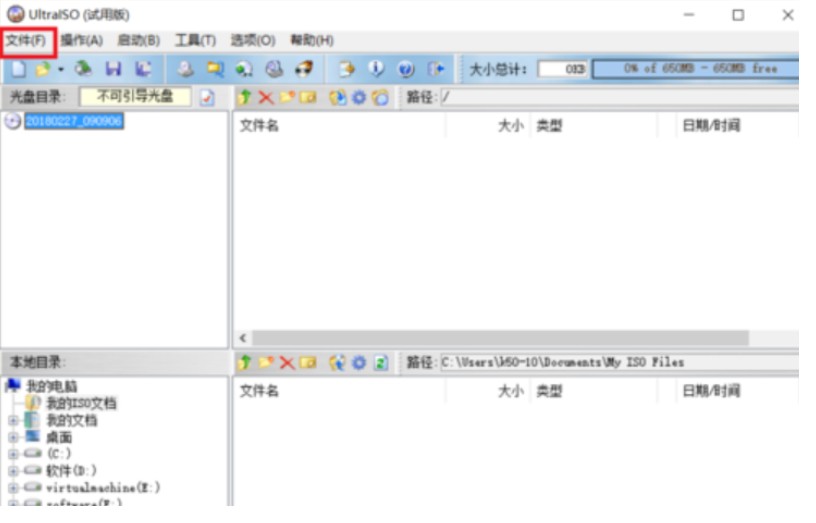
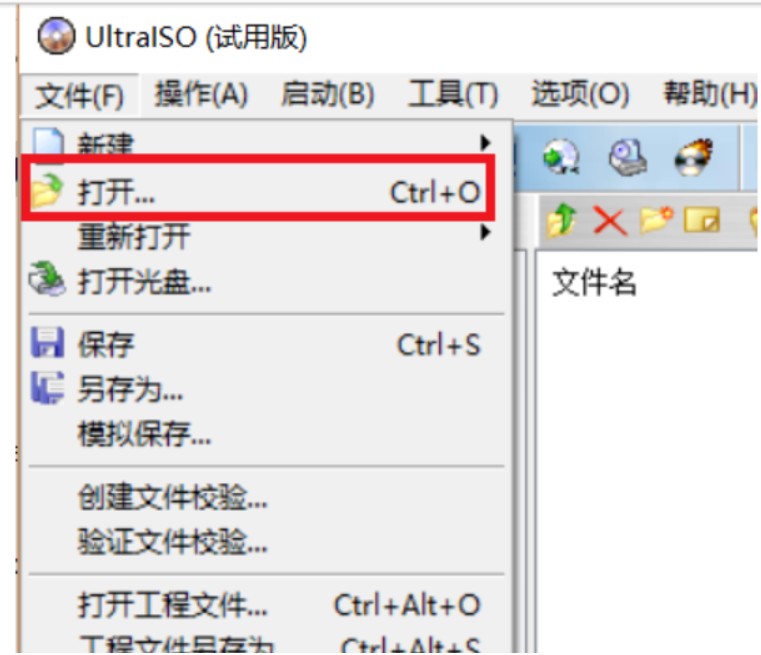
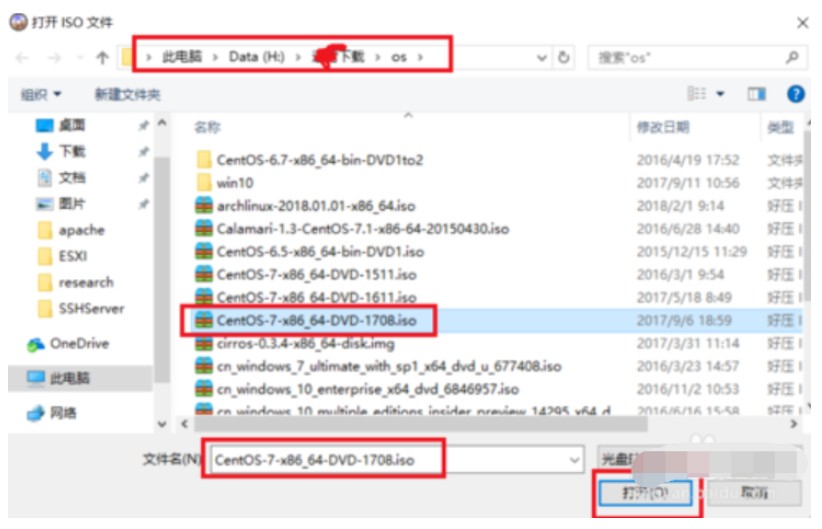
2,开UltraISO后,它的操作界面如下图所示,点击左上角的文件,然后再点打开。选择我们刚才展示的CentOS 7.4 安装镜像。然后点击打开。
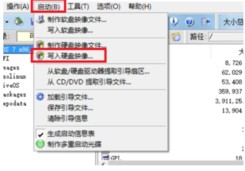
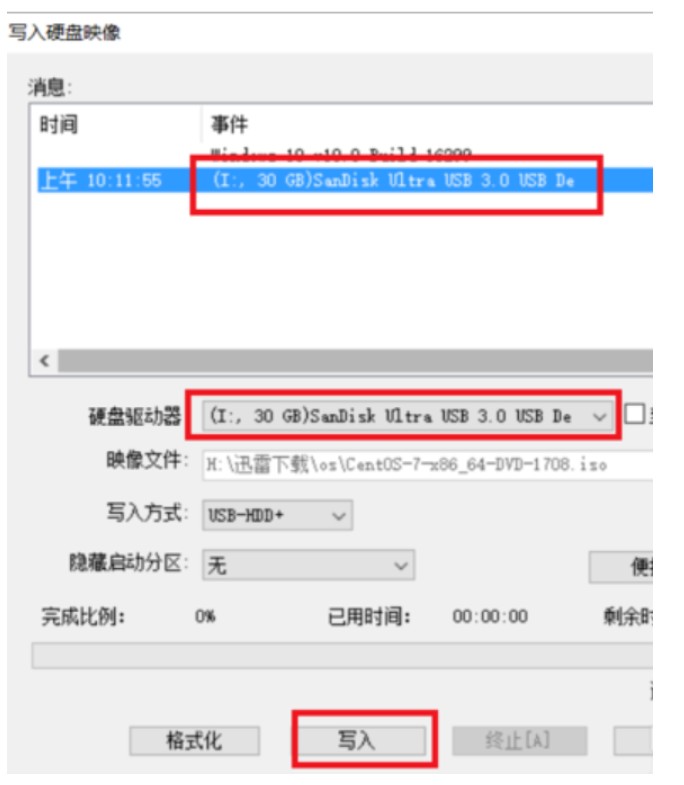
 3,此时在UltraISO界面就能看到镜像里的所有文件了,然后点击界面上的启动选项,选择制作硬盘镜像。此时Ultraiso就会自动监测到我们插入的U盘,如果你的电脑上同时插了多个U盘,可以点击下拉按钮选择你要写入镜像的U盘,千万不要搞错,因为这一步会格式化U盘。选择好以后,点击写入,硬盘镜像就会开始制作,我们耐心等待制作完毕。
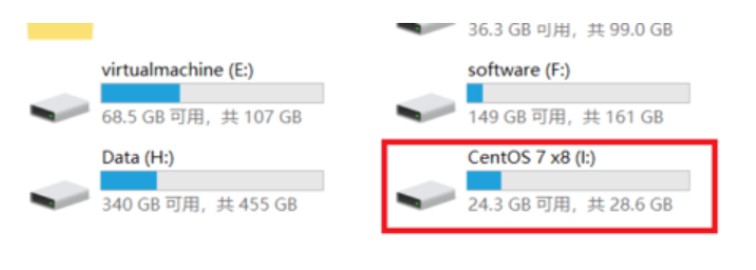
 4,等待镜像制作完毕后,我们就能在系统里看到制作好的U盘,此时U盘的名称都变成了CentOS 7,如下图所示,我们把U盘拔下来,插到要安装Linux的电脑上面去。然后就可以准备使用这个U盘安装Linux系统了。
第二步:u盘安装Linux
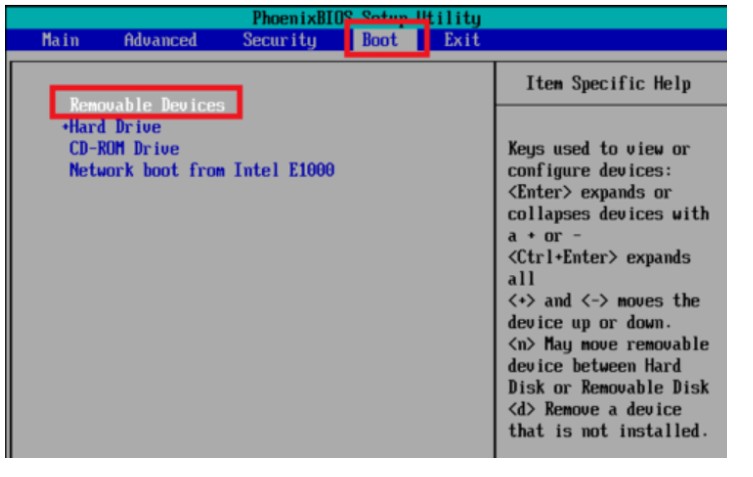
1,U盘插到要安装Linux的电脑上后,启动电脑,在启动时,一直按F2键,就能进入到主板的BIOS控制界面,按左右键移动到boot选项。然后按上下键到removeable device选项,再按+号移动它的位置在最上方。因为我这台电脑比较老,所以U盘只能显示为removeable device,对于一些比较新的主板,可以直接显示出U盘的名称。那就把这个名称移动到最上方即可。然后按F10保存设置,按回车确认,系统开始重启。
2,重启后,就会自动从U盘启动,然后就显示出了Linux系统的安装选项,移动鼠标到第一个Install CentOS 7,然后敲回车。再按一次回车,就开始安装。
- 发表于 2020-02-25 21:41
- 阅读 ( 5591 )
- 分类:linux
